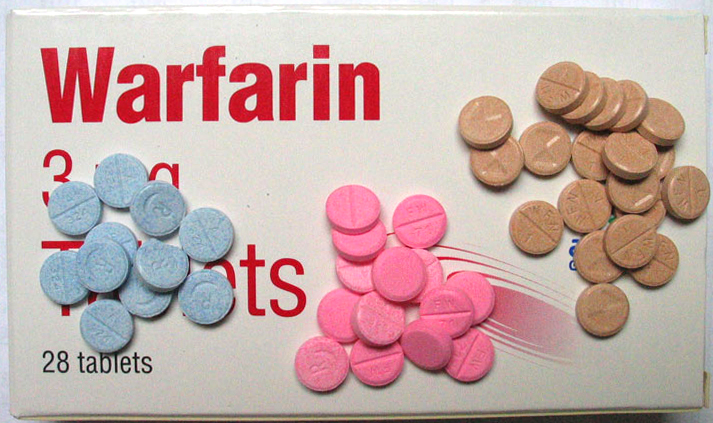
Patients with atrial fibrillation are often treated with anticoagulants such as warfarin (Coumadin) to prevent stroke. When undergoing endoscopic procedures such as upper endoscopy or colonoscopy, anticoagulant drugs are usually held several days in advance to allow the blood thinning effects to dissipate. This way, if interventions need to happen during the procedure, such as biopsy, polypectomy, or dilation, the risk of bleeding is lessened.
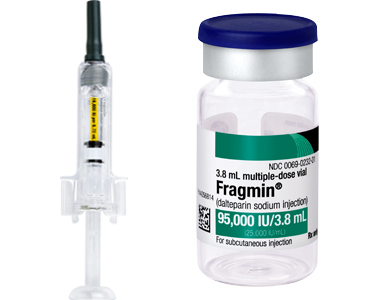
Sometimes it is recommended to “bridge” the patient with another anticoagulant for those few days that Coumadin is held. The theory is that by holding the anticoagulant the risk of stroke increases, and this risk might be further increased by the stress of surgery on the body. Therefore, patients are often given an injectable anticoagulant such as enoxaparin (Lovenox) or dalteparin (Fragmin); this takes effect immediately and protects against strokes for the few days the Coumadin is held before the procedure, and for the few days after Coumadin is restarted but before the levels are therapeutic.
But is this common practice of bridging from Coumadin to an injectable anticoagulant back to Coumadin necessary? From a practical point, it is usually a major inconvenience for patients and doctors alike. Many patients are uncomfortable giving themselves injections at home. The injectable anticoagulants are sometimes expensive. Sometimes despite good instruction, they are administered incorrectly by the patient, or on the wrong dates. What if Coumadin was just held and later restarted without the bridging?
To answer this question, investigators did just that: A randomized, double-blinded, placebo-controlled noninferiority trial of bridging versus not bridging (appropriately named the “BRIDGE” trial) was just published this week in the New England Journal of Medicine. A noninferiority trial is designed to show that one intervention is “non inferior” to another intervention. This is different from most trials that try to show Drug A is better than Drug B. Noninferiority trials assign a predetermined number to how much better or worse Drug A has to be when compared to Drug B to consider them no different. For example, if Drug A cures disease X in 50% of patients, and Drug B cures disease X in 48% of patients, and we say that within a 3% margin there really is no major difference, than we can say that Drug B is not worse than Drug A. The margin of non inferiority needs to be pre-specified before the trial however, based on what is an acceptable difference to consider negligible.
The investigators in the BRIDGE trial enrolled 1884 patients with atrial fibrillation on Coumadin who were undergoing surgical procedures, with about 50% of these procedures being gastrointestinal endoscopy. The subjects were atrial fibrillation patients with various risk factors for stroke (this is rated by the “CHADS score” with 1 being low risk and 6 being highest risk) with an average CHADS score of 2.3 in this trial. The primary outcome measured was the rate of arterial thromboembolism (stroke, etc.) and the primary safety outcome was incidence of major bleeding. Other outcomes including myocardial infarction, deep vein thrombosis, pulmonary embolism, and death. Of note, important exclusion criteria were patients with mechanical heart valves, a thromboembolic event in the previous 12 weeks, or major bleeding in the previous 6 weeks.
So what did they find? In a nutshell, there was no difference between any of the outcomes measured with bridging versus not bridging. The only difference was seen in the rates of bleeding: Major bleeding increased three-fold in the bridged group, and minor bleeding increased as well. Therefore, their conclusions were that not bridging is not inferior to bridging, and perhaps not bridging is even safer since the risk of bleeding is dramatically increased by bridging.
It is important to note a few things about this study. It should be rather generalizable since it included a wide variety of patients at different risks of stroke, undergoing different procedures. It is worth noting that about 50% of the patients studied underwent endoscopy or colonoscopy, therefore this study applies to gastroenterologists perhaps more than other specialties. Also, it needs to be emphasized that this was only a study of patients on Coumadin: patients on newer anticoagulant drugs like Pradaxa (dabigatran), Xarelto (rivaroxaban), and Eliquis (apixaban) were not studied here, and therefore these results cannot be applied to that population. However, these newer anticoagulants are typically easier to manage in this regard since they are “rapid on, rapid off” and therefore bridging is usually not necessary.
If you enjoyed this article, sign up for our free newsletter and never miss a post!
Reference:
Douketis JD, Spyropoulos AC, Kaatz S, et al. Perioperative bridging anticoagulation in patients with atrial fibrillation. N Engl J Med 2015;373:823-33.
Diverticulosis is the most common cause of significant lower gastrointestinal bleeding. The appearance of diverticulosis on colonoscopy is that of small outpouchings, or pockets, in the colon wall. When severe, the colon can have a “swiss cheese” appearance, due to the many pockets present.
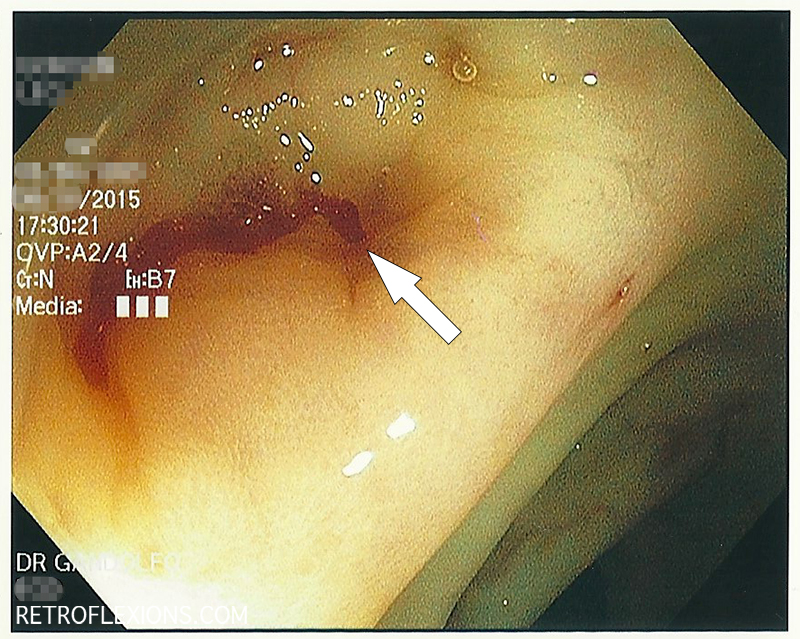
(L) Multiple sigmoid colon diverticuli and obvious blood in the colon; (R) The white arrow shows the actively bleeding diverticulum near the hepatic flexure.
Diverticular bleeding can happen without warning, and is painless. A large volume of bright red or sometimes dark red blood per rectum is often the only symptom. In most patients who are not on blood thinners, diverticular bleeding eventually stops by itself. However, this may take a day or two and require multiple blood transfusions to support the patient while he or she is losing blood rapidly. This can make treating diverticular bleeding frustrating since often in the time it takes for the patient to present to the hospital, get stabilized, transfused, and prepped for a colonoscopy the bleeding has already stopped and no clear source is found.
Nevertheless, there are many ways to treat presumed diverticular bleeding, and colonoscopy is often employed as both a diagnostic and therapeutic procedure. The added advantage of colonoscopy is that other pathology can be detected in the case of non-diverticular bleeding. Bowel prep is still important when looking for a bleeding source on colonoscopy, however in the presence of active bleeding it is near-impossible to get a good bowel prep due to the ongoing bleeding. If the bleeding is rapid enough, the blood itself can act as a bowel prep and flush out any stool that remains in the colon (distal to the bleeding site). If the patient is otherwise stable at the moment, sometimes a tap water enema is all that is needed to make the prep adequate to do an urgent (same day) colonoscopy.
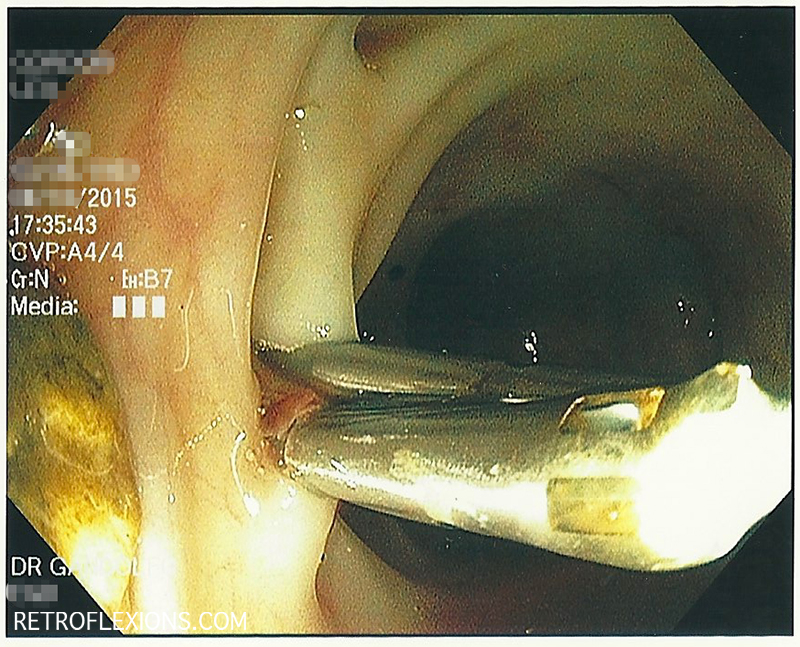
After injection of epinephrine into the bleeding diverticulum. The bleeding is slowed to a trickle and the bleeding site is identified (white arrow).
In the pictures above, the bleeding diverticulum was found and epinephrine was injected to slow the bleeding enough to see exactly where it was coming from. There is a small artery associated with each diverticulum, and if the artery ruptures (for various reasons), bleeding occurs. To best treat the bleeding, it is important to see exactly where the artery is located.
Two hemoclips are applied (one on each side of the bleeding vessel) and bleeding stops.
The bleeding artery is successfully treated with clips. These clips will eventually fall off in a matter of weeks, and by that time the body will have healed the bleeding site. Despite effective treatment of an episode of diverticular bleeding, it is important to remember that most patients have multiple diverticula, and another episode of bleeding can happen at any time from a separate diverticulum.
The issue of when to perform colonoscopy on patient with significant lower gastrointestinal bleeding has been studied in the past. Several studies show that “urgent” colonoscopy (done no later than 8-12 hours from presentation to the hospital) found more actively bleeding (and therefore treatable) lesions. What is interesting however is that when compared to “elective” colonoscopy (done within 2 days of presentation to the hospital), urgent colonoscopy did not improve the important endpoints that matter, namely mortality, rebleeding rate, hospital length of stay, or units of blood transfused.
Therefore, done within a bleeding protocol consisting of ruling out upper gastrointestinal bleeding, and performing appropriate radiologic tests, elective colonoscopy and urgent colonoscopy seem to be equivocal. However, as with anything, these approaches must be tailored to the individual patient, the competing comorbidities (such as need to resume blood thinners), the time of day, and the local expertise available.
If you enjoyed this article, sign up for our free newsletter and never miss a post!
References:
Green BT, Rockey DC, Portwood G, et al. Urgent colonoscopy for evaluation and management of acute lower gastrointestinal hemorrhage: a randomized controlled trial. Am J Gastroenterol 2005;100:2395-2402.
Laine, L and Shah, A. Randomized trial of urgent vs. elective colonoscopy in patients hospitalized with lower GI bleeding. Am J Gastroenterol 2010;105:2636-41.
Filed under: Gastroenterology and Endoscopy
Comments: Comments Off on Treatment of diverticular bleeding with colonoscopy
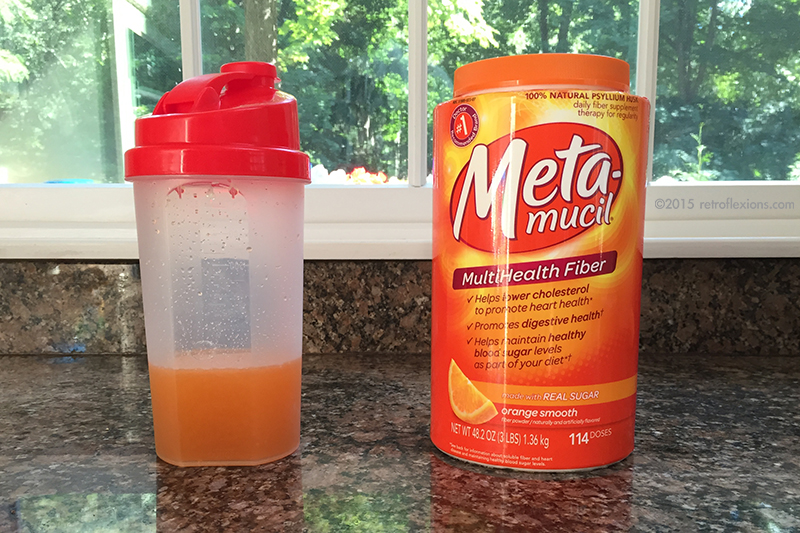
Fiber supplements containing Psyllium (such as Metamucil and Konsyl) are effective for treating and preventing constipation, as well as lowering cholesterol. These products seem to work best when dissolved in water. Although there are pill forms of these supplements, I prefer the powder form since it guarantees that enough water is taken with the fiber to help make it into a gel and allow it to move along easily in the gut. Since these supplements contain both soluble and insoluble fiber, they are sometimes hard to mix well. Once mixed they can form a gel consistency that can be difficult to drink, and at the same time much of the product can settle at the bottom of the glass and never make it into your mouth. The key with these fiber supplements is to mix them well then drink them right away.
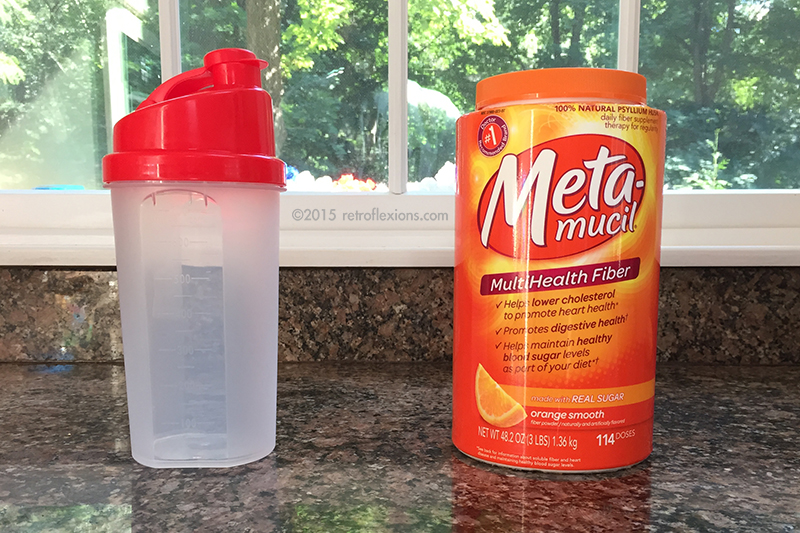
I find that using a shaker bottle really helps to quickly mix the fiber with water, and also allows for easy re-mixing after you start drinking. These shaker bottles are usually marketed for bodybuilders as a quick and portable way to mix protein powder, and can be bought for a few bucks at any supplement store or online (I got this one from Amazon.com.)
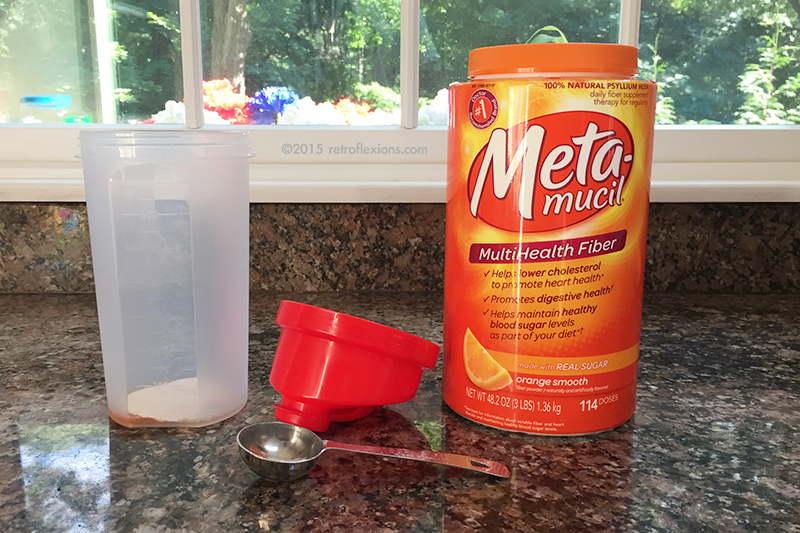
You just put a serving of fiber in the bottle, add the right amount of water (I used 8 ounces in the picture below), put the cap on and shake a few times. Then you can drink right from the bottle…three or four gulps and it’s gone. If the fiber settles out before you can finish, shake it again. Cleanup is easy too: Just add warm water to the bottle (maybe with a drop of soap) and shake. Open it up and rinse it out and you’re done.
Shake it up!
These bottles make taking fiber supplements easy. On the road or at home, now there are no good excuses why you can’t get some extra fiber!
If you enjoyed this article, sign up for our free newsletter and never miss a post!
Fecal microbiota transplantation (FMT) is the process of administering a preparation of healthy donor stool to a patient with a certain disease, usually Clostridium difficile colitis, in an attempt to treat the disease. I covered some of the basics about the microbiome and FMT in a previous article, so this will just be a cookbook-style post on how we do FMT with colonoscopy.
First, a healthy donor must be identified. The donor should be in good general health, since theoretically some problems such as obesity, diabetes, autoimmune disease, etc., may be transmitted by fecal transplant. The donor cannot have taken antibiotics for at least three months prior to the fecal transplant. The donor must also have appropriate blood and stool tests done (which will be covered in a future article.) It can take several days for all the testing to be done and the results received.
Once the donor is fully screened and ready, the date is set for the transplant. If the patient is still taking antibiotics for C. difficile, he or she is instructed to stop these 48-72 hours prior to the transplant, if possible. The patient is then given a standard colonoscopy bowel prep the night before the procedure. This serves two important purposes. First, the colon must be prepped to allow for a safe colonoscopy and allow the doctor to see where he or she is going. Second, in theory, the bowel prep will purge the colon of stool and bacteria, and allow the new donor stool to colonize the patient without much competition from the patient’s diseased former microbiome. After all, the purpose of the FMT is to replace the dysfunctional microbiome with a new healthy one, so it’s best to start with a blank canvas.
On the day of the transplant, the patient arrives to the endoscopy suite fasting with a prepped colon. On the way to the endoscopy suite, the patient is instructed to take 4 mg of loperamide (Imodium) to slow down the colonic transit and hopefully allow the donor stool to dwell in the colon for a longer period of time. The donor must also produce a stool on the day of transplant, and this specimen will be used to perform the actual transplant. If the donor is not “regular” and cannot be certain that they will be able to move their bowels on the day of the procedure, then a gentle laxative such as milk of magnesia is recommended the evening prior to the transplant, just before going to bed. The donor stool must be provided as fresh as possible, and should be used within 8 hours (maximum) of being passed. Therefore, the donor is instructed to have the bowel movement at home, and to provide the stool in a clean “tupperware” container. Kudos to the few donors who can arrive to the endoscopy suite and have a bowel movement on command just before the procedure, but this is not necessary (nor is it recommended) since sometimes performance anxiety sets in, and then we have a patient and doctor waiting to do the transplant, but no donor stool to do it with!
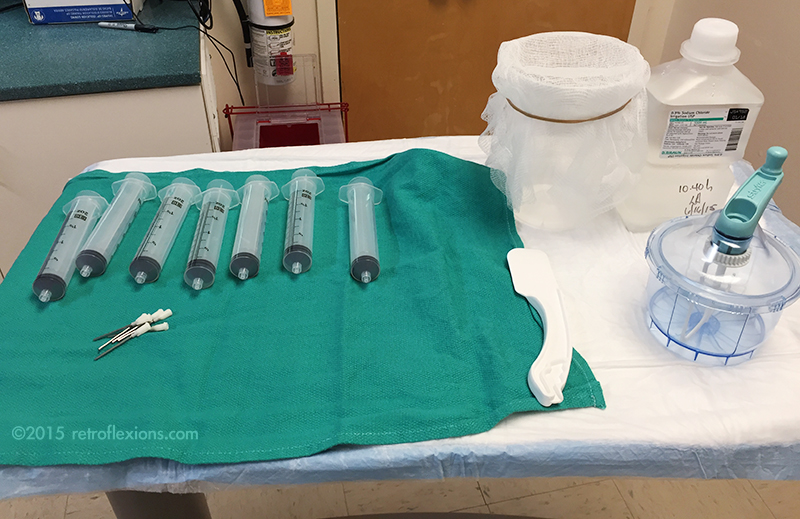
It should go without saying, but obviously full barrier precautions are needed when dealing with stool. The person doing the stool preparation should be wearing a gown, gloves, a mask, and a face shield. If available, this should ideally be done under a laboratory hood with ventilation. The donor stool is prepared as follows:
Top row from left to right: syringes, container with gauze, saline. Bottom row: spatula and mixer.
A mixer is needed; I use a small disposable hand mixer with a tightly-locking lid (made by Stryker to mix bone cement for orthopedic cases…as it turns out, this is a perfect device for mixing stool for FMT.) The entire stool is put into the mixer along with normal saline. I usually start with about 200-300 cc of room temperature non-bacteriostatic saline for the first extraction. The stool and saline is mixed for a minute or two (this is why it is important to have a mixer with a tightly sealing lid) and the result is a brown thin liquid. The mixer is then opened and the liquid is poured slowly into the container with the gauze on top. A rubber band is useful to hold the gauze in place. This process strains out any solid material in the stool, and the result is a brown liquid in the container below.
The solid material captured on the gauze is then put back into the container using the spatula, and another ~200 cc of saline is added. The mixing and straining process is repeated until about 400-500 cc of stool extract is obtained in the container. The extract should be opaque and the color should be a medium-to-dark brown, like very muddy water. If it is transparent, then too much saline or not enough stool was used.
This is the result of the mixing and extraction process.
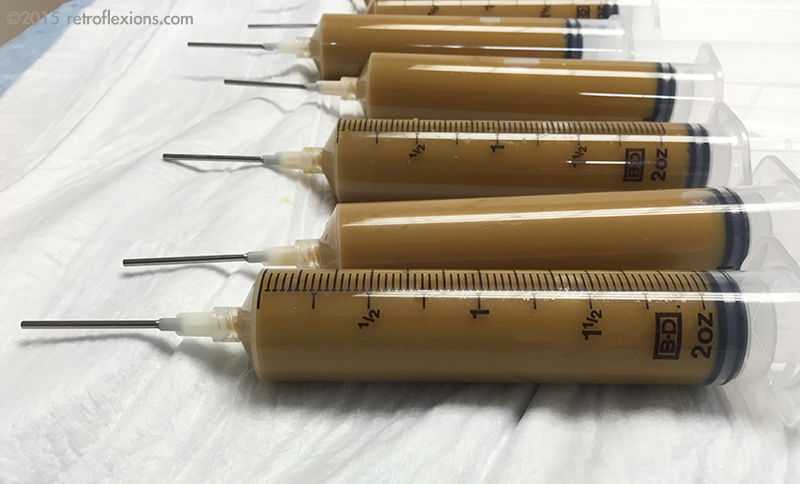
The mixture is then drawn up into large syringes and fitted with blunt-tipped needles made to fit into the colonoscope biopsy port. Each syringe holds 60 cc of material.
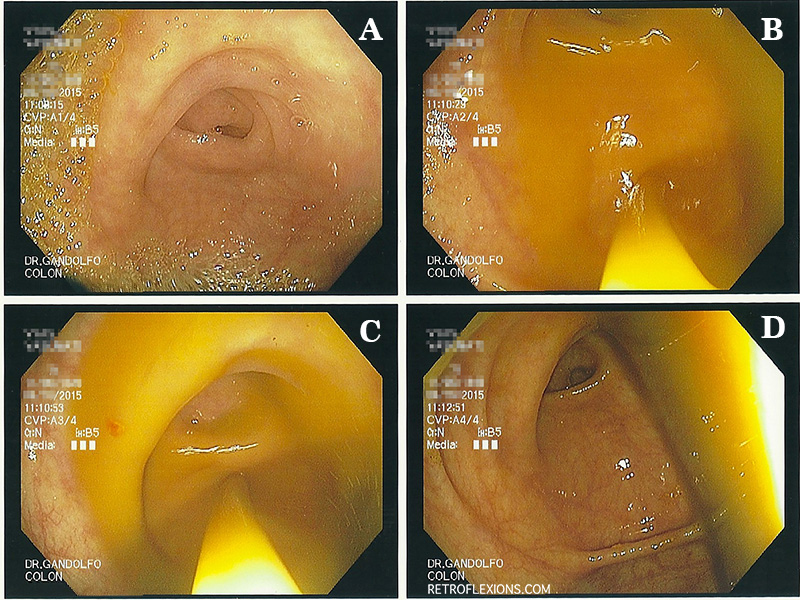
The patient is then brought into the procedure room and given the standard sedation used for a colonoscopy. I use carbon dioxide insufflation instead of air for fecal transplant cases since this is easier to absorb and may cause less of the need to pass air (and as a side effect, stool) at the end of the procedure. The colonoscopy is performed and I try to suction out as much as the remaining liquid inside the colon as possible on the way in. Once the end of the colon is reached it is time for the transplant to happen. The entire payload of stool extract (usually 400-500 cc) is delivered into the cecum by injecting the contents of the syringes through the biopsy channel of the colonoscope.
A: appendiceal orifice. B and C: spraying the fecal transplant extract into the cecum through the scope. D: transplanted stool in cecum.
The fecal extract exits the tip of the scope and fills the cecum, and soon will naturally move distally to coat the entire colon. At this point, my goal is to get the scope out as quickly as possible, and not to have any of the transplanted stool follow me out. Gastroenterologists are trained to inspect the colon on the withdrawal phase of colonoscopy, however this must be avoided, and the scope should simply be removed from the patient rapidly without giving any additional insufflation gas in the process. The exception is that if there is a large amount of retained gas in the patient from the procedure, this should be suctioned out quickly. But don’t stop to biopsy a polyp! This being said, it is considered safe to biopsy things on the way into the colon, before the transplant is given.
Remember the Imodium we gave the patient before the procedure? Hopefully this has taken effect by now and slowed down the gut motility giving the transplanted microbiome more time to colonize the colon. The more contact time between the transplanted stool and the patient’s colon the better. The body’s natural tendency is to expel the donor stool, so often despite all of the above efforts, the patient will have watery diarrhea soon after the transplant procedure. The goal is to minimize this as much as possible.
After the transplant, the patient is educated about what to expect over the following days. The occurrence of a low-grade temperature the evening of transplant is not totally uncommon after FMT, and should NOT be treated with antibiotics since this will wipe out the transplant! Antibiotics of any kind should be avoided for as long as possible (unless needed for severe infections.) Constipation, gas, bloating, and excessive flatulence are also sometimes reported in the few days following FMT, but usually these side-effects are mild and self-limited. Probiotics are often given for a month or so after FMT, although this is optional.
Also, it is very important to have the patient’s family prepare the house for their arrival. It needs to be cleaned to prevent re-infection from C. difficile spores, as outlined in a previous article.
If you enjoyed this article, sign up for our free newsletter and never miss a post!
References:
Brandt LJ. American Journal of Gastroenterology lecture: Intestinal microbiota and the role of fecal microbiota transplant (FMT) in the treatment of C. difficile infection. Am J Gastroenterol 2013;108:177-85.
Kelly CR, Kahn S, Kashyap P, et al. Update on fecal microbiota transplantation 2015: Indications, methodologies, mechanisms, and outlook. Gastroenterology 2015;149:223-237.
Filed under: Techniques
Comments: Comments Off on How to do a fecal microbiota transplant
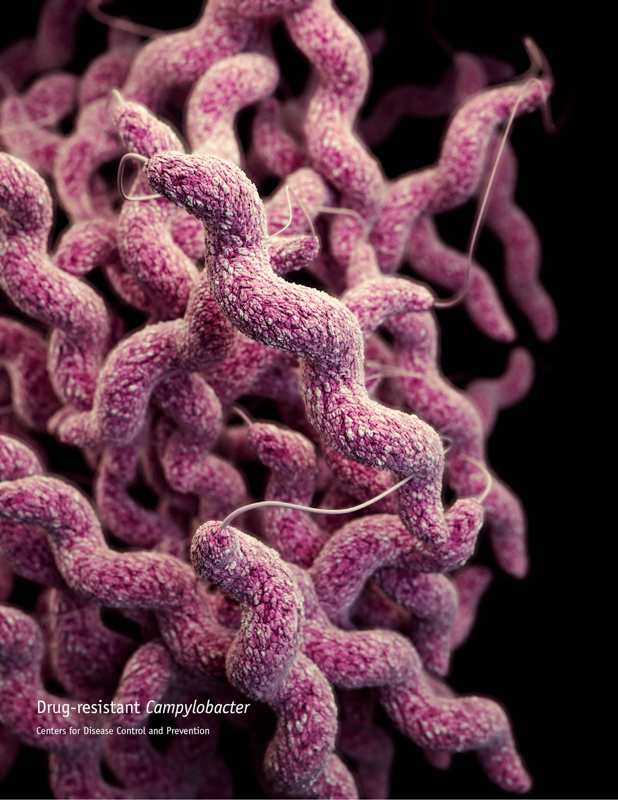
Some people seem to get “stomach bugs” all the time, while other people rarely have these issues. Vomiting, abdominal pain, fever, and diarrhea are the common symptoms of a variety of enteric infections that often start after the soon-to-be victim ingests the infectious organism. These bacteria have wonderful names like Salmonella, Shigella, Campylobacter, E. coli, Vibrio, and C. difficile, just to name a few. A host of viruses commonly cause similar issues. The symptoms of gastroenteritis and infectious colitis can range from a minor annoyance to life-threatening dehydration due to ongoing vomiting and diarrhea.
If you think about it, our stomach acid acts as a first-line of defense against infectious agents that we may consume. The very acidic gastric juices can kill most bacteria, or at least cut down the number of viable organisms and perhaps limit the severity of disease. It would stand to reason that the common acid-suppressing drugs in the proton pump inhibitor (PPI) class (e.g., Prilosec, Nexium, Protonix, etc.) may interfere with this process by blocking the ability to make stomach acid, and therefore making the stomach a more friendly place for the various bacteria that we may ingest. This logic is correct: with chronic PPI use, the stomach bacterial count rises dramatically, and the resistance to ingested pathogenic bacteria decreases as well. The result is an approximate two-fold to eleven-fold increase (depending on the bacteria and the study) in the risk of getting an enteric infection if you are using a PPI.
As it turns out, that is just part of the story. As with most things in our bodies, there are multiple levels of complexity and many diseases are multifactorial in nature…a little of this, a little of that, add some bad luck, and you have a disease. PPI drugs also can lead to increases in the amount of bacteria in the small intestine, a condition called small intestinal bacterial overgrowth. There is also an increase in bacterial translocation across the gut with PPI use. This so-called “leaky gut” phenomenon is when bacteria and other substances can directly pass from the inside lining of the intestine through the mucosa between the cells and into the blood stream. The “leaky gut syndrome” has been linked to many disease states, but is overall a poorly understood topic.
Further down the gastrointestinal tract, PPI use has even been shown to alter the colonic microbiome. This is likely a downstream result of the changes in the gastric and small intestinal microbiome, as well as other complex mechanisms such as alterations in gut motility and possibly even direct effects of the PPI drugs themselves. The end result is that PPI use can alter the way the entire GI tract interacts with pathologic bacteria, and can change the native microbiome.
So pay special attention to the medication list if your patient claims to have a “weak stomach” and is getting frequent enteric infections. If PPI drugs are on the list, think about stopping them if there is no good indication for continued therapy. That being said, we should always be looking at the medication list and stopping medications that don’t have a good indication for continued therapy!
If you enjoyed this article, sign up for our free newsletter and never miss a post!
References:
Bavishi C, DuPont HL. Systematic review: the use of proton pump inhibitors and increased susceptibility to enteric infections. Aliment Pharmacol Ther 2011;34:1269-81.
Reimer C. Safety of long-term PPI therapy. Best Pract Res Clin Gastroenterol 2013;27:443-54.
Filed under: Gastroenterology and Endoscopy
Comments: Comments Off on Why do proton pump inhibitors increase the risk of enteric infections?
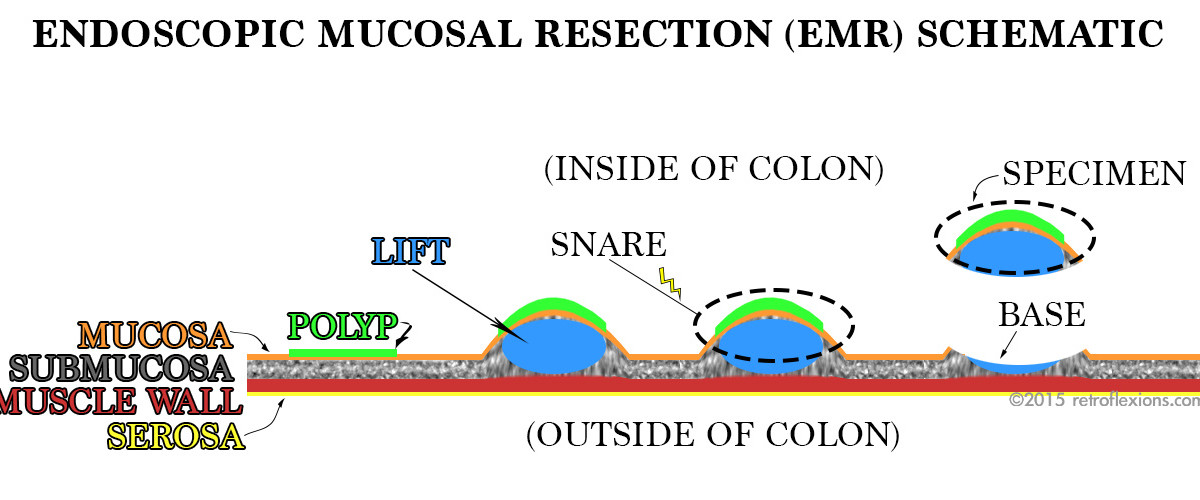
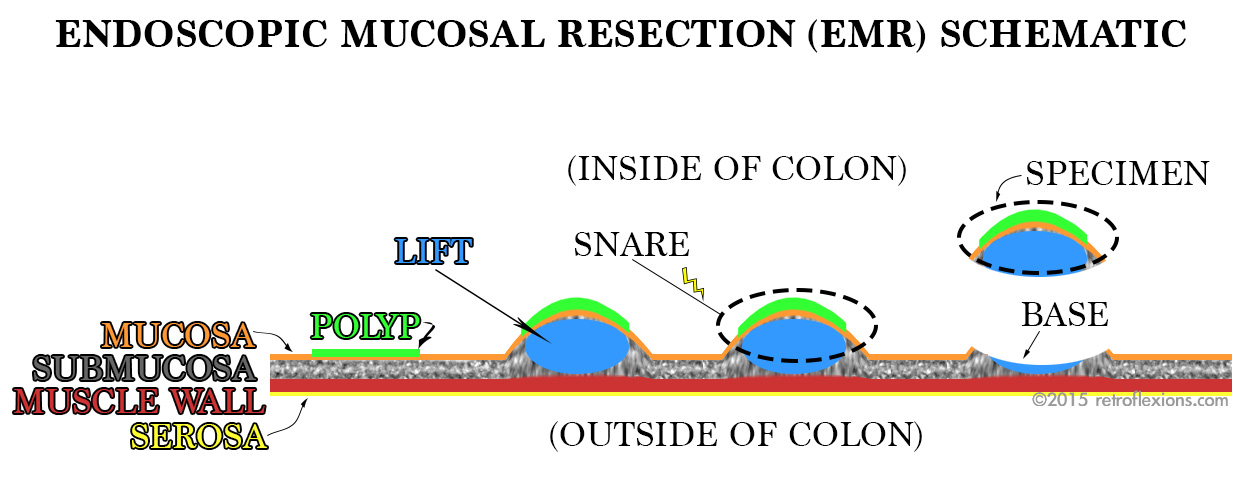
Simplified diagram of EMR of a flat colon polyp. The polyp (green) is lifted away from the colon wall (red and yellow) by injection of saline (blue) or some other substance into the submucosa (grey space). The lesion is then safely resected with snare electrocautery, without harming the muscle layer beneath.
Endoscopic mucosal resection (EMR) is a technique used to remove large polyps from the gastrointestinal tract. It works well for many different types of polyps, but is often reserved for large or flat polyps that cannot be removed by other endoscopic methods. Patients are often spared surgery for large polyps by having EMR done instead. Many lesions that have been deemed “not endoscopically resectable” can actually be safely removed by a gastroenterologist with training and experience in EMR.
Just as the name suggests, endoscopic mucosal resection is an endoscopic method of removing the inner layer of the GI tract (the mucosa). It is accomplished by creating a temporary space beneath the mucosa within the wall of the organ that allows the operator to safely work with much less risk of causing a complication such as perforation through the outer wall of the organ. Below the mucosa (the innermost layer), there is the submucosa. The submucosa is home to blood vessels and many supporting connective tissues for the organ.
By injecting fluid (usually saline) into the submucosa, this space is expanded much like inflating a balloon. With a deep submucosal cushion beneath, the mucosa can then safely be “shaved” off with a snare. In the case of a large polyp, this technique is repeated many times to resect the entire polyp in a piecemeal fashion.
There are many pointers and nuances of EMR, and these details will make excellent subjects for future articles. For now, I will just show a few pictures from a recent colonoscopy where the EMR technique was used to resect a large rectal polyp:
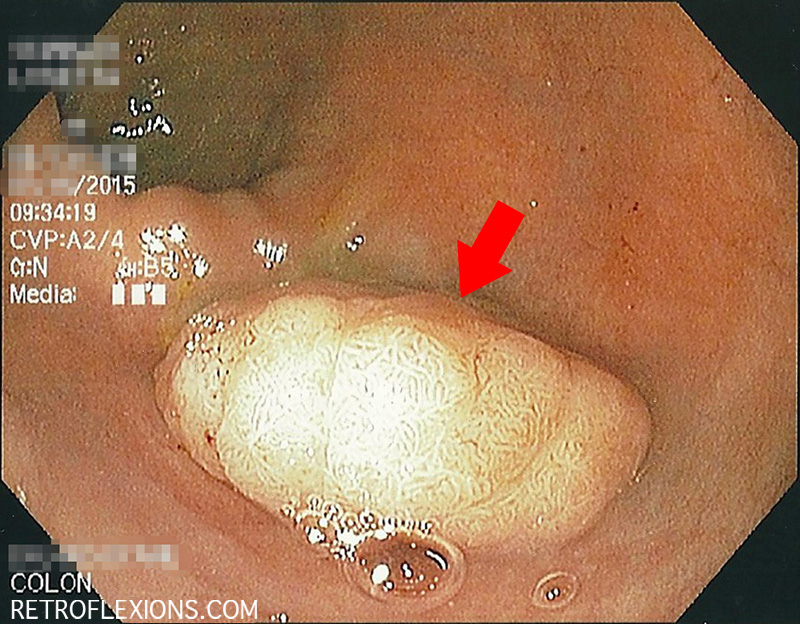
Sessile rectal polyp (red arrow) measuring approximately 2 cm across.
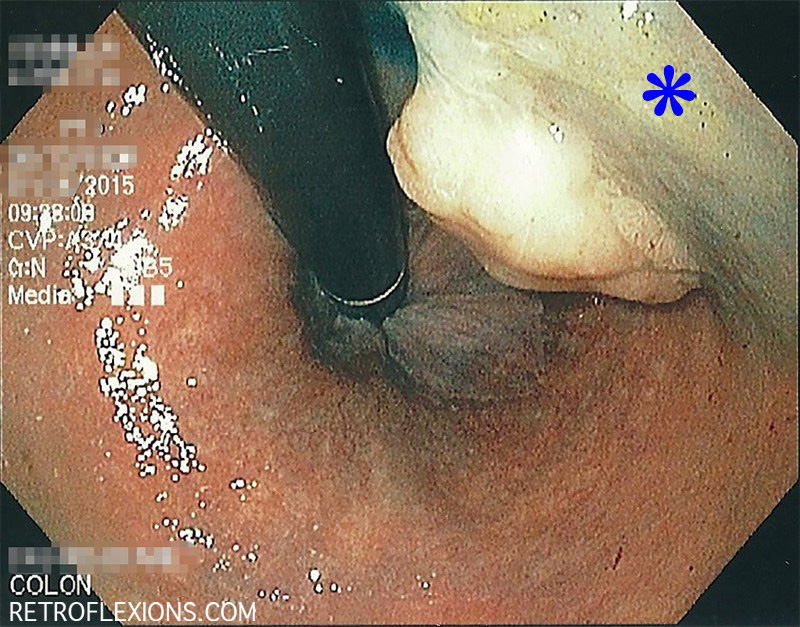
Retroflexed view after injection with saline and blue stain (methylene blue). Asterisk denotes area of submucosal lifting.
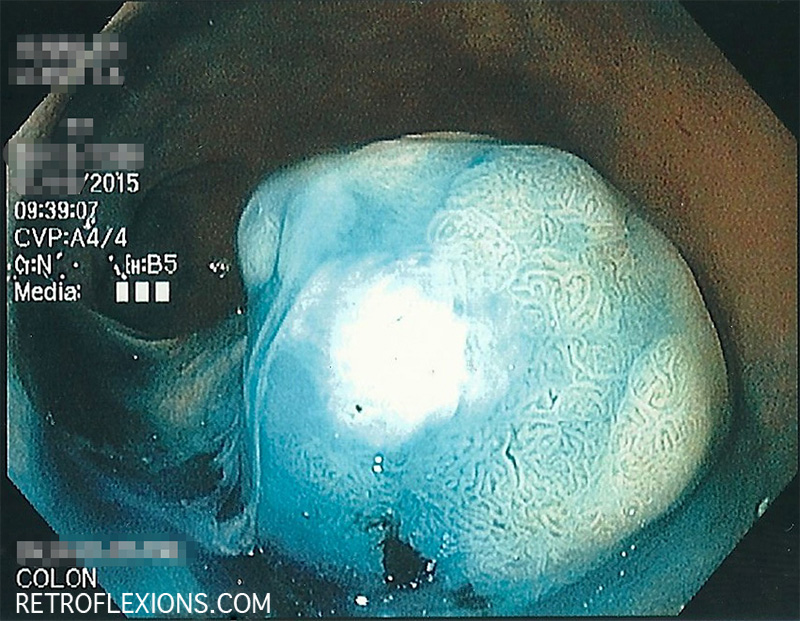
Some blue dye used to lift the polyp was sprayed on the surface. This can help to better identify the edges of the lesion by increasing contrast.
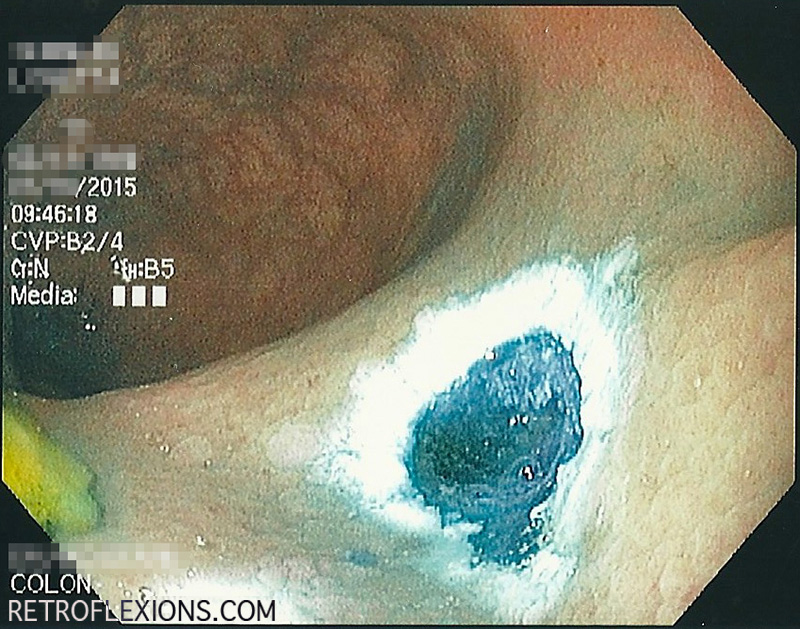
The resection base, after the polyp was removed with a snare. The white halo is cauterized tissue; the blue center is submucosa that was stained by methylene blue. This is considered a complete resection.
If you enjoyed this article, sign up for our free newsletter and never miss a post!

